The idea of tackling home improvement projects can be daunting, especially when it involves major appliances like an air conditioner. Many homeowners dream of efficient heating and cooling without the hefty installation costs of traditional HVAC systems. This is where the MrCool DIY Mini Split steps in, promising a revolutionary “do-it-yourself” approach to home comfort. But does this popular system truly live up to its easy installation claims, or are there hidden complexities for the average homeowner? This comprehensive review will delve into the MrCool DIY Mini Split, examining its features, performance, installation process, and overall value, helping you decide if it’s the right solution for your space.
Overview of MrCool DIY Mini Split Systems
MrCool DIY Mini Splits are ductless heat pump systems specifically engineered for self-installation. Unlike conventional central air conditioning or other mini-split systems that require specialized HVAC tools and expertise for refrigerant handling, MrCool DIY units come with pre-charged linesets and quick-connect fittings. This innovative design aims to simplify the installation process, making it accessible to handy homeowners without needing to hire a professional HVAC technician. These systems offer both efficient cooling in the summer and effective heating in colder months, providing a versatile, year-round climate control solution. Available in various BTU ratings, from 12,000 to 36,000, and in both 120V and 240V options, MrCool DIY offers models suitable for single rooms, garages, workshops, or even multi-zone applications.
Key Factors When Considering a MrCool DIY Mini Split
Choosing the right heating and cooling system involves weighing several critical factors. For the MrCool DIY Mini Split, understanding the nuances of its installation, performance, cost, and warranty is crucial to making an informed decision.
Installation Ease: The DIY Promise
|
Our Picks for the Best Air conditioner in 2026
As an Amazon Associate I earn from qualifying purchases.
|
||
| Num | Product | Action |
|---|---|---|
| 1 | Frigidaire 5,000 BTU Window-Mounted Air Conditioner, Cools Up to 150 Sq. Ft., Quiet Operation, Effortless Temperature Control, 2 Fan Speeds, Auto Restart, White |

|
| 2 | Midea 12,000 BTU U-Shaped Smart Inverter Window Air Conditioner–Cools up to 550 Sq. Ft., Ultra Quiet with Open Window Flexibility, Compatible with Alexa/Google Assistant, 35% Energy Savings (Renewed) |
|
| 3 | LEVOIT Tower Fan for Bedroom, 90° Oscillating Standing Fan with 28dB Quiet for Sleep, 25ft/s Velocity, 12H Timer, 5 Speeds 4 Modes, Remoter, Bladeless Room Fan for Home, Office, Indoor, 36 inch, White |
|
| 4 | Amazon Basics 6000-BTU Window Air Conditioner with Quiet Operation, Up to 250 Sqf, Cool and Fan Functions, Washable Filter, Adjustable Window Kit, Digital Temperature Display, Remote Control, White |
|
| 5 | Amazon Basics 5000-BTU Window Air Conditioner with Quiet Operation, Up to 150 Sqf, Cool and Fan Functions, Washable Filter, Adjustable Window Kit, Intuitive Mechanical Controls, for Small Room, White |
|
| 6 | 12000 BTU Portable Air Conditioner, 3-in-1 Portable AC Unit with Cooling, Dehumidifier and Fan Modes, Cools Up to 450 Sq.Ft, LED Display Air Conditioners with Window Kit and Remote Control |
|
| 7 | Feelfunn 8,000 BTU Portable Air Conditioner - 3-in-1 Portable AC Unit for Rooms Up to 350 Sq. Ft., with Remote Control, Cooling, Dehumidifier & Fan Modes, AC Unit for Bedroom, Office, Apartment |
|
| 8 | Midea 8,000 BTU U Shaped Smart Inverter Window Air Conditioner - Cools 350 Sq Ft, Ultra Quiet with Open Window Flexibility - Alexa/Google Assistant Compatible - 37% Energy Savings, Remote (Updated) |
|
| 9 | Shinco 8,000 BTU Portable Air Conditioner, AC Unit with Built-in Cool, Dehumidifier & Fan Modes for Room up to 350 sq.ft, Conditioner Remote Control, 24 Hour Timer, Installation Kit |
|
| 10 | Midea 5,000 BTU EasyCool Small Window Air Conditioner - Cool up to 150 Sq. Ft. with Easy-to-Use Mechanical Controls and Reusable Filter, Perfect for Small Bedroom, Living Room, Home Office |
|
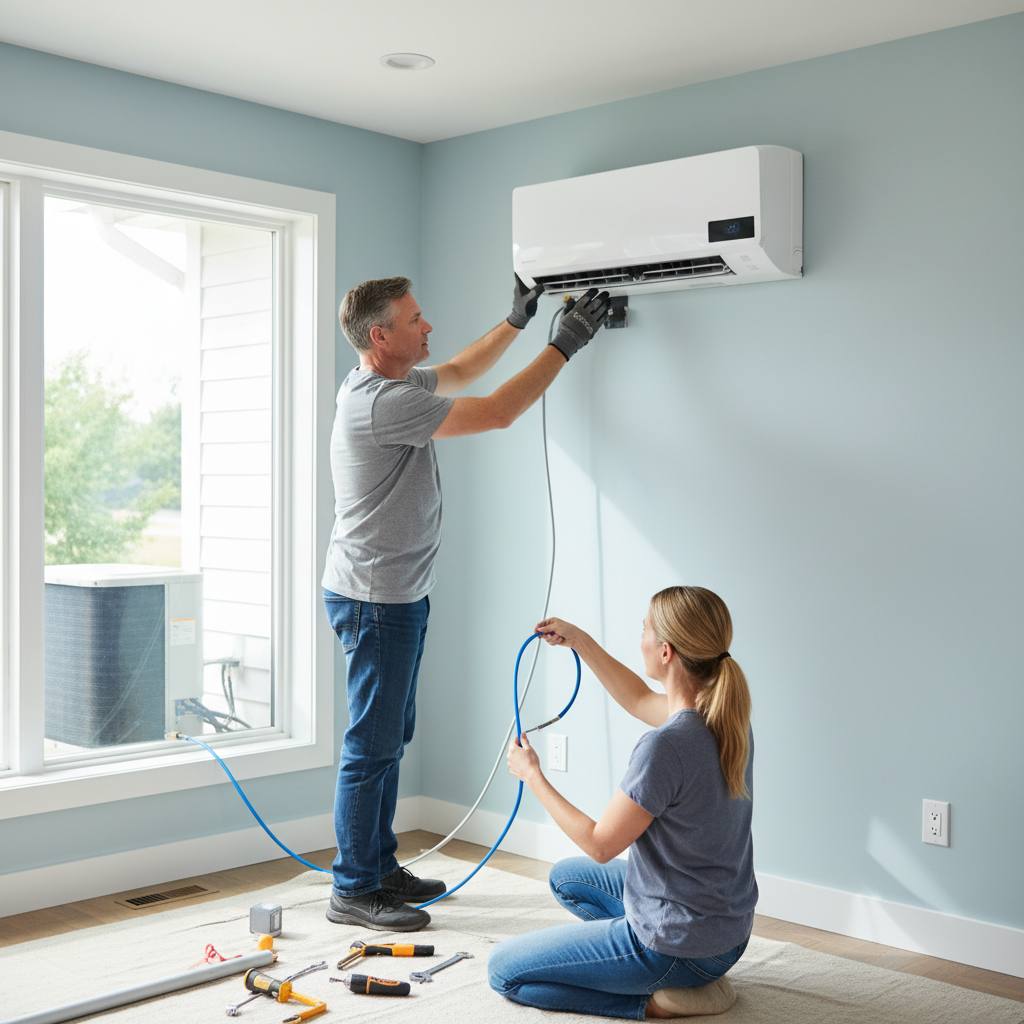
The cornerstone of the MrCool DIY system is its promise of an easy, homeowner-friendly installation. This is largely attributed to its unique design features. The linesets, which carry the refrigerant between the indoor and outdoor units, come pre-charged from the factory. This eliminates the need for expensive vacuum pumps and the precise skill required to charge a system with refrigerant, a common hurdle in traditional mini-split installations. Furthermore, the system utilizes quick-connect fittings, allowing users to simply screw the linesets onto the indoor and outdoor units with a couple of wrenches, bypassing the need for specialized flaring equipment.
However, “easy” doesn’t mean “effortless.” While the HVAC-specific tasks are simplified, the installation still involves drilling a three to four-inch hole through an exterior wall for the lineset, mounting the indoor air handler securely, and installing the outdoor condenser unit. Basic electrical wiring is also necessary to power the units, and while many handy homeowners can manage this, the manufacturer often advises having a qualified electrician handle the required disconnect installation. A significant challenge that DIYers must navigate is carefully bending the copper lineset to route it neatly without kinking the tubing, as this can damage the refrigerant lines. Managing any excess lineset length also requires creativity, as the lines cannot be cut or modified.
Performance and Efficiency
Once installed, MrCool DIY units are generally reported to deliver reliable performance. Many users praise the system for its remarkably quiet operation, both from the indoor air handler and the outdoor condenser, often noting that they hardly notice it’s running. In terms of temperature control, the units are capable of effectively cooling in hot weather and providing ample heat during colder periods, maintaining desired indoor temperatures across their rated square footage. While specific energy efficiency ratings vary by model, MrCool systems typically incorporate inverter technology, which allows the compressor to adjust its speed to match the cooling or heating demand, leading to more consistent temperatures and potentially significant energy savings compared to older, single-stage units.
Cost-Effectiveness and Value
The financial appeal of the MrCool DIY Mini Split lies in its potential for significant labor cost savings. While the initial purchase price of a MrCool DIY unit can sometimes be higher than comparable mini-split units that require professional installation, the overall cost savings come from avoiding professional labor fees. Installation costs for a traditional single-zone mini-split can range from $300 to $1,500, and for multi-zone systems, they can climb to $1,500 to over $5,000. For the competent DIYer, this represents a substantial saving that can make the MrCool a very attractive option.
However, it’s also important to consider the long-term cost implications. Some users have reported issues such as units arriving with low refrigerant or experiencing motor failures within a few years of operation. While the warranty covers parts, it typically does not cover the labor or shipping costs associated with repairs, meaning homeowners might still incur expenses or have to perform the repairs themselves. This can lead to unexpected out-of-pocket costs and effort down the line, affecting the total cost of ownership.
Warranty and Support
A significant advantage of the MrCool DIY system is its robust warranty, which explicitly does not get voided by self-installation. Most MrCool DIY units come with a 5-year parts warranty and an impressive 7-year compressor warranty. This extended coverage for the compressor, often the most critical component, offers peace of mind. For comparison, some competitors only offer a 2-year parts warranty.
Despite the favorable warranty terms, experiences with customer support have been mixed. Some users have expressed concerns about the quality or responsiveness of customer service. Should a problem arise, while parts may be covered, the responsibility for troubleshooting, diagnosing, acquiring, and installing replacement components, along with paying for any shipping, often falls squarely on the homeowner.
MrCool DIY: Pros and Cons
Like any product, the MrCool DIY Mini Split comes with a unique set of advantages and disadvantages. Understanding these can help potential buyers determine if it aligns with their expectations and capabilities.
Pros:
- Genuine DIY Installation: The pre-charged linesets and quick-connect fittings significantly simplify the most complex aspects of mini-split installation, making it genuinely accessible for many homeowners.
- Warranty Not Voided by DIY: A major selling point is that the extensive warranty coverage (5-year parts, 7-year compressor) remains valid even if you install the unit yourself.
- Quiet Operation: Users frequently commend the systems for their remarkably quiet performance, contributing to a more peaceful indoor environment.
- Effective Climate Control: The units provide efficient and consistent heating and cooling for the designated areas.
- Versatility: Ideal for a variety of spaces, including garages, workshops, home additions, or to supplement existing HVAC systems.
Cons:
- Higher Initial Unit Cost: The upfront price for MrCool DIY units can sometimes be greater than that of comparable mini-splits requiring professional installation.
- Potential for Early Issues: Some users have reported experiencing problems such as units being low on refrigerant out of the box or motor failures within the first few years.
- DIY Responsibility for Repairs: While parts are covered under warranty, labor and shipping costs for repairs are not, meaning homeowners must perform the work or pay for it themselves.
- Lineset Handling Requires Care: Bending the pre-charged lineset without kinking it is a critical and potentially challenging step that can lead to system damage if not done correctly.
- Electrical Expertise Still Beneficial: Basic electrical wiring knowledge is necessary, and some aspects, like installing a disconnect, may still warrant an electrician’s involvement.
- Mixed Customer Support Experiences: Some users have expressed concerns regarding the quality and responsiveness of customer service.
Who is the MrCool DIY Mini Split For?
The MrCool DIY Mini Split is a niche product designed for a specific type of user and application. Identifying whether you fit this profile is key to a satisfactory experience.
Ideal Users
The MrCool DIY system is perfectly suited for handy homeowners who possess basic home repair skills, some electrical acumen, and a good deal of patience. These individuals are often comfortable with drilling, mounting, and following detailed instructions. It’s an excellent solution for those looking to add efficient heating and cooling to garages, workshops, home offices, sunrooms, small additions, or individual rooms without extending existing ductwork. Crucially, it appeals to budget-conscious individuals who are eager to save money by taking on the installation labor themselves, thereby avoiding professional installation fees that can run into the thousands.
When to Reconsider
Conversely, the MrCool DIY may not be the best choice for everyone. If you are uncomfortable with basic home repairs, complex instructions, or any electrical work, hiring a professional might be a better, safer investment. Similarly, if you are looking for a full-service, worry-free installation experience where a technician handles everything from start to finish, the DIY route will likely prove frustrating. People needing very long lineset runs, complex routing through multiple walls, or multi-zone systems with intricate configurations might find the DIY process overly challenging. Lastly, if you prioritize comprehensive professional support and hands-off maintenance over potential cost savings, a professionally installed system from a reputable HVAC company could be a more suitable option.
Tips for a Successful MrCool DIY Installation
A successful MrCool DIY installation hinges on careful planning and execution. Following these tips can help ensure a smooth process and optimal system performance.
- Read the Manual Thoroughly: Before starting, completely read and understand the installation manual. It contains crucial step-by-step instructions, diagrams, and safety warnings specific to your model.
- Plan Lineset Routing Carefully: Visualize the path the lineset will take from the indoor unit, through the wall, and to the outdoor unit. Aim for the shortest, straightest route possible. Take extreme care when bending the lineset to avoid kinks, as this can severely damage the pre-charged refrigerant lines. Consider purchasing a lineset cover kit for a tidy and protected external appearance.
- Verify Electrical Requirements: Ensure you have a dedicated circuit with the correct voltage (120V or 240V) and amperage for your specific MrCool model. While you might perform some wiring, it is often recommended to have a licensed electrician install the required outdoor disconnect and connect the unit to your main electrical panel.
- Secure Mounting: Use a sturdy mounting template and ensure both the indoor air handler and outdoor condenser unit are securely attached to solid surfaces, following the manufacturer’s guidelines for clearances.
- Seek Help for Heavy Lifting: The outdoor condenser unit can be quite heavy. Enlist a friend or family member to help safely lift and position it to avoid injury.
- Check for Leaks (Optional but Recommended): Although the linesets are pre-charged and quick-connect, a professional leak test can provide extra assurance, especially if you suspect any issues during connection.
User Experiences: What Real DIYers Say
The MrCool DIY Mini Split has generated a wide range of feedback from homeowners who have installed it themselves. Many users report high satisfaction, praising the system for being genuinely straightforward to install and performing exceptionally well. They often highlight the ease of the quick-connect fittings and the absence of complex vacuuming, making the installation process manageable even for those with limited HVAC experience. These positive experiences often stem from successful installations in areas like garages or single room additions, where the system provides effective heating and cooling, and its quiet operation is a notable benefit.
However, not all experiences are without their challenges. Some DIYers have encountered issues, such as units reportedly being low on refrigerant right out of the box, leading to reduced efficiency and unexpected troubleshooting. Other long-term reviews have mentioned motor failures after a few years of use, requiring the homeowner to source and replace parts themselves, with the warranty covering parts but not labor or shipping. These instances underscore that while the installation is simplified, homeowners should be prepared for potential DIY repairs and the associated effort if issues arise over time. Feedback on customer support can also vary, with some users reporting difficulties in getting timely or effective assistance, adding to the self-reliance aspect of owning a MrCool DIY system.
“The pre-charged lines and quick-connect fittings genuinely simplify the hardest parts of HVAC. It’s a game-changer for homeowners who want to save on installation costs.” – John Smith, HVAC Enthusiast & DIY Homeowner
Conclusion
The MrCool DIY Mini Split truly stands out for its innovative approach to home comfort, making the dream of self-installed heating and cooling a tangible reality for many. Its pre-charged linesets and quick-connect fittings genuinely simplify the most complex aspects of HVAC installation, eliminating the need for specialized tools and professional refrigerant handling. For the handy homeowner, this translates into significant savings on labor costs and the satisfaction of a successful DIY project.
However, it’s important to approach the MrCool DIY with realistic expectations. While the process is simplified, it still requires careful planning, basic home repair skills, and attention to detail, particularly when handling the lineset and electrical connections. Potential buyers should also be aware of reports concerning long-term reliability and the fact that warranty claims for parts do not cover labor or shipping expenses for repairs. Ultimately, the MrCool DIY Mini Split offers a compelling value proposition for those willing to take on the installation and potential future maintenance themselves. Is the MrCool DIY the perfect fit for your specific home comfort needs and DIY capabilities?
Frequently Asked Questions
Is the MrCool DIY mini split truly an easy installation?
Yes, compared to traditional mini splits, the MrCool DIY is designed for ease of installation due to its pre-charged lineset and quick-connect fittings, which eliminate the need for vacuuming or refrigerant charging equipment. However, basic handy skills and careful execution, especially when routing the lineset, are still required.
Does installing MrCool DIY void the warranty?
No, one of the key advantages of MrCool DIY systems is that the warranty, typically 5-year parts and 7-year compressor, is specifically designed to remain valid even with self-installation.
What tools do I need to install a MrCool DIY mini split?
Basic tools such as a drill, wrenches, a level, and a hole saw are generally needed. Specialized HVAC tools like vacuum pumps or flaring kits are typically not required, thanks to the pre-charged lines and quick connectors.
Can a MrCool DIY system heat as well as cool?
Yes, MrCool DIY units are heat pumps, meaning they provide both efficient cooling in the summer and effective heating in colder months, making them a versatile, year-round climate control solution for your home.
How much can I save by installing a MrCool DIY mini split myself?
You can potentially save hundreds to thousands of dollars by avoiding professional installation labor costs. These costs typically range from $300 to over $5,000, depending on the system’s complexity and the number of zones.