Is your air conditioner struggling to start, making a low humming noise, or blowing warm air? These frustrating symptoms often point to a common culprit: a failing AC capacitor. This small but mighty component is crucial for getting your unit’s fan and compressor motors up and running. While it might seem daunting, replacing an AC capacitor is a repair many homeowners can tackle themselves with the right tools, knowledge, and an unwavering commitment to safety. This guide will walk you through everything you need to know, from understanding what a capacitor does to a detailed, step-by-step replacement process.
Understanding Your AC Capacitor
An AC capacitor is an electrical component that stores energy and provides a burst of power to help start the AC unit’s motors. Think of it like a temporary battery that gives the compressor and fan motor the initial jolt they need to overcome inertia and begin operation. Without a functional capacitor, these motors may hum but fail to spin, leaving your home hot and uncomfortable.
There are generally three types of capacitors found in AC systems:
- Start Capacitors: These provide a large initial surge of power to start the compressor motor, typically found in older or heavier-duty units. They are designed for short bursts of power.
- Run Capacitors: These maintain a steady flow of electricity to the compressor and fan motors while the unit is running, ensuring efficient and continuous operation. They are built for continuous duty.
- Dual Capacitors: The most common type in modern AC units, a dual capacitor combines both start and run functions for the compressor and the condenser fan motor into a single cylindrical unit. They have three terminals: “Herm” (for the compressor), “Fan” (for the fan motor), and “C” or “Common” (for incoming power).
Signs of a Failing AC Capacitor
Recognizing the symptoms of a bad capacitor can save you from unnecessary repairs or prolonged discomfort. Look out for these common indicators:
- AC Not Starting: The unit makes a faint hum but the fan doesn’t spin, or the compressor doesn’t kick in.
- Slow Start-Up: The outdoor unit takes an unusually long time to start after the thermostat calls for cooling.
- Humming Noise: A distinct humming or buzzing sound coming from the outdoor unit, often accompanied by a lack of fan or compressor operation.
- Unit Blows Warm Air: If the compressor isn’t running due to a failed capacitor, the AC will only circulate warm air.
- Fan Runs, Compressor Doesn’t: The outdoor fan may spin, but the unit isn’t cooling because the compressor isn’t starting.
- Visibly Swollen or Leaking Capacitor: A physical inspection might reveal a bulging top or sides, or even a leaking fluid from the capacitor, which are clear signs of failure.
|
Our Picks for the Best Air conditioner in 2026
As an Amazon Associate I earn from qualifying purchases.
|
||
| Num | Product | Action |
|---|---|---|
| 1 | Midea 12,000 BTU U-Shaped Smart Inverter Window Air Conditioner–Cools up to 550 Sq. Ft., Ultra Quiet with Open Window Flexibility, Compatible with Alexa/Google Assistant, 35% Energy Savings (Renewed) |

|
| 2 | Midea 8,000 BTU U Shaped Smart Inverter Window Air Conditioner - Cools 350 Sq Ft, Ultra Quiet with Open Window Flexibility - Alexa/Google Assistant Compatible - 37% Energy Savings, Remote (Updated) |
|
| 3 | Amazon Basics 6000-BTU Window Air Conditioner with Quiet Operation, Up to 250 Sqf, Cool and Fan Functions, Washable Filter, Adjustable Window Kit, Digital Temperature Display, Remote Control, White |
|
| 4 | 12000 BTU Portable Air Conditioner, 3-in-1 Portable AC Unit with Cooling, Dehumidifier and Fan Modes, Cools Up to 450 Sq.Ft, LED Display Air Conditioners with Window Kit and Remote Control |
|
| 5 | Frigidaire 5,000 BTU Window-Mounted Air Conditioner, Cools Up to 150 Sq. Ft., Quiet Operation, Effortless Temperature Control, 2 Fan Speeds, Auto Restart, White |
|
| 6 | Feelfunn 8,000 BTU Portable Air Conditioner - 3-in-1 Portable AC Unit for Rooms Up to 350 Sq. Ft., with Remote Control, Cooling, Dehumidifier & Fan Modes, AC Unit for Bedroom, Office, Apartment |
|
| 7 | Shinco 8,000 BTU Portable Air Conditioner, AC Unit with Built-in Cool, Dehumidifier & Fan Modes for Room up to 350 sq.ft, Conditioner Remote Control, 24 Hour Timer, Installation Kit |
|
| 8 | Midea 5,000 BTU EasyCool Small Window Air Conditioner - Cool up to 150 Sq. Ft. with Easy-to-Use Mechanical Controls and Reusable Filter, Perfect for Small Bedroom, Living Room, Home Office |
|
| 9 | Amazon Basics 5000-BTU Window Air Conditioner with Quiet Operation, Up to 150 Sqf, Cool and Fan Functions, Washable Filter, Adjustable Window Kit, Intuitive Mechanical Controls, for Small Room, White |
|
| 10 | LEVOIT Tower Fan for Bedroom, 90° Oscillating Standing Fan with 28dB Quiet for Sleep, 25ft/s Velocity, 12H Timer, 5 Speeds 4 Modes, Remoter, Bladeless Room Fan for Home, Office, Indoor, 36 inch, White |
|
Essential Tools and Safety First
Before you even think about touching your AC unit, gathering the correct tools and understanding crucial safety precautions is paramount. Electricity is dangerous, and capacitors can store a significant charge even after power is disconnected.
Tools Needed:
- Screwdrivers: Philips and flathead, preferably with insulated handles. A flathead screwdriver is essential for safely discharging the capacitor.
- Needle-Nose Pliers: Useful for disconnecting and reconnecting wires.
- Wire Brush (Optional): To clean terminals if corroded.
- Multimeter with Capacitance Setting (Optional but Recommended): For testing the old capacitor and verifying discharge.
- New AC Capacitor: Crucially, this must precisely match the specifications (microfarads/uF and voltage/VAC) of your old capacitor.
- Insulated Gloves and Safety Glasses: Personal protective equipment (PPE) is non-negotiable for electrical work.
- Marker or Camera: To label wires or take pictures before disconnection.
Crucial Safety Precautions
This is the most critical section of this guide. Ignoring these steps can result in severe electrical shock, injury, or even death.
- Disconnect All Power: Before opening your AC unit, always turn off the power at two locations:
- Thermostat: Set your thermostat to “Off” or “Cool” and then “Off.”
- Outdoor Disconnect Switch: This is usually a small box mounted on the wall near your outdoor AC condenser unit. Open the cover and pull out the fuse block or flip the breaker switch to the “Off” position. Some units may have an indoor breaker as well; ensure that is also off.
- Verify Power Off: Use a voltage tester or multimeter to confirm there is no power reaching the unit’s electrical components before proceeding.
- Discharging the Capacitor: Capacitors can store a dangerous electrical charge for an extended period, even after the power supply is cut.
- Using a screwdriver with an insulated handle, place the metal shaft across the terminals of the capacitor. You may hear a pop or see a spark as the charge dissipates.
- Repeat this process for all terminal combinations on a dual capacitor (e.g., Common to Herm, Common to Fan, Herm to Fan).
- For extra safety, and if you have a multimeter with a capacitance setting, you can use it to confirm the capacitor is fully discharged (reading near 0 volts).
- Wear Protective Gear: Always wear insulated gloves and safety glasses when working with electrical components to protect against shock and potential arcing.
Step-by-Step Guide to Replacing Your AC Capacitor
With safety measures firmly in place, you can now proceed with the replacement.
Step 1: Power Down and Access the Unit
Ensure both the thermostat and the outdoor disconnect are powered off. Use your screwdriver to remove the screws securing the access panel on your outdoor condenser unit. Carefully set the panel aside.
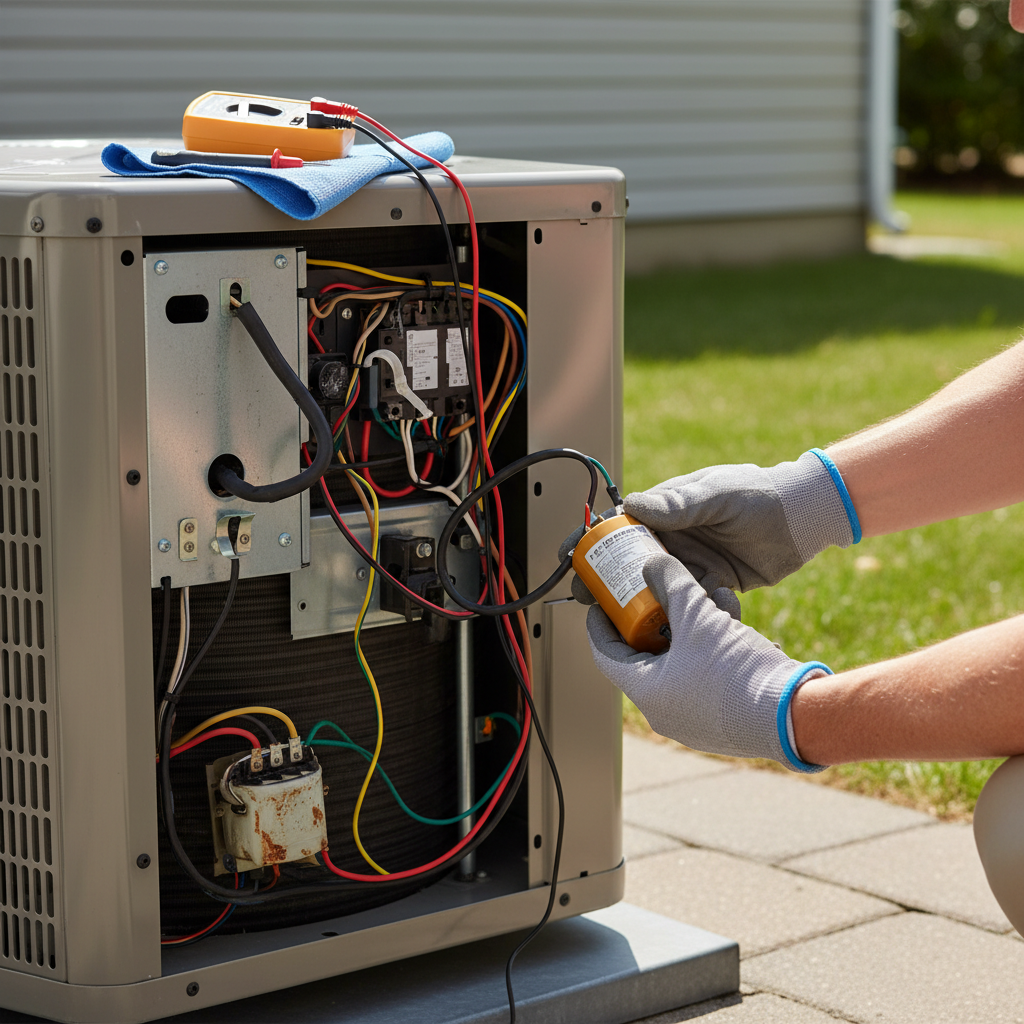
Step 2: Locate and Photograph the Capacitor
Inside the electrical compartment, you’ll find the capacitor – a cylindrical component, often black, silver, or sometimes brown. It will have several wires connected to its terminals. Before disconnecting anything, take clear, close-up photographs of the capacitor and all its wiring connections. These photos are your invaluable map for reconnecting the new capacitor correctly. Pay close attention to which colored wire connects to which terminal (Common, Fan, Herm).
Step 3: Discharge the Old Capacitor Safely
Even after turning off the power, the capacitor can hold a lethal electrical charge. Use your insulated-handle screwdriver to carefully bridge the terminals of the capacitor. For a single capacitor, short the two terminals. For a dual capacitor, short the “C” (Common) terminal to “Herm,” then “C” to “Fan,” and finally “Herm” to “Fan.” You might see a spark or hear a pop – this is normal and indicates the stored energy is being safely released.
Step 4: Disconnect and Remove the Old Capacitor
Once discharged, carefully disconnect the wires from the capacitor’s terminals using needle-nose pliers or by gently pulling the connectors. Refer to your photos frequently to ensure you remember each wire’s original position. After all wires are detached, loosen the strap or clamp holding the capacitor in place and slide it out of the unit.
Step 5: Select and Install the New Capacitor
It is crucial that your new capacitor matches the specifications of the old one. This means identical microfarads (uF) and voltage (VAC) ratings. These numbers are printed on the side of the capacitor. Do not use a capacitor with different ratings, as this can damage your AC unit. Place the new capacitor into the bracket, ensuring it’s securely fastened so it won’t vibrate loose during operation.
Step 6: Reconnect Wiring and Close Up
Using the photos you took earlier, carefully reconnect the wires to the corresponding terminals on the new capacitor. Double-check every connection to ensure it matches your reference photos perfectly. Wires connected incorrectly can cause serious damage to your unit. Once all wires are securely attached, replace the access panel and tighten its screws.
Step 7: Restore Power and Test Your AC
With everything reassembled and secured, return to your outdoor disconnect switch and restore power to the unit. Then, go inside and turn your thermostat back to “Cool” and set it a few degrees lower than the current room temperature to activate the AC. Listen and observe your unit. It should start up smoothly, and you should feel cool air circulating indoors. If you notice any unusual noises or smells, immediately shut off the power and investigate.
When to Call a Professional
While replacing a capacitor is a common DIY task, there are instances when calling a certified HVAC technician is the safest and most prudent choice.
- Discomfort with Electrical Work: If you are not confident or comfortable working with electricity, even after reviewing safety precautions, it’s always best to err on the side of caution.
- Complex Wiring or Unfamiliar Components: Some AC units have more intricate electrical systems. If you find the wiring confusing or encounter components you don’t recognize, professional help is advised.
- Ongoing Issues: If replacing the capacitor doesn’t resolve your AC problems, it indicates a deeper issue that requires diagnostic expertise. A technician can accurately pinpoint the root cause.
- Warranty Concerns: Attempting DIY repairs might void your AC unit’s warranty. Check your warranty terms before proceeding.
Hiring a professional might cost more upfront (typically between $150-$400 for a capacitor replacement), but it ensures the job is done correctly and safely, potentially preventing more expensive damage down the line.
Conclusion
Replacing a faulty AC capacitor can be a straightforward and cost-effective DIY repair that restores your cooling system to peak performance. By carefully following the step-by-step instructions, meticulously adhering to all safety protocols, especially discharging the capacitor and disconnecting power, and ensuring you have the correct replacement part, you can successfully tackle this task. However, never underestimate the power of electricity, and remember that when in doubt, a qualified HVAC technician is always the best resource to ensure your comfort and safety. Are you ready to take back control of your home’s cool comfort?
Câu Hỏi Thường Gặp
How often should an AC capacitor be replaced?
AC capacitors typically last between 10 to 15 years, but their lifespan can be shortened by extreme heat, power surges, and frequent AC cycling. It’s not a part that requires routine replacement unless it shows signs of failure.
Can I use a capacitor with different MFD/uF or VAC ratings?
No, it is critical to use a replacement capacitor with the exact same microfarad (uF or MFD) and voltage (VAC) ratings as the original. Using a capacitor with incorrect specifications can lead to motor damage, inefficiency, or even fire hazards.
What happens if I don’t discharge the capacitor?
Failing to discharge a capacitor before handling it can result in a severe, potentially fatal, electrical shock. Capacitors store electrical energy, and touching the terminals while it’s charged will cause this energy to release through your body.
How much does a new AC capacitor cost?
A new AC capacitor typically costs between $10 to $50 for the part itself, depending on its specifications and brand. This makes it a very affordable DIY repair, significantly less than the cost of professional service.
What are the dangers of replacing an AC capacitor yourself?
The primary danger is electrical shock, as capacitors can store a lethal charge. There’s also the risk of damaging the AC unit if the wiring is reconnected incorrectly or if the wrong capacitor is installed. Always prioritize safety and know your limits.